The water valve in your refrigerator is a small component that does a big job, controlling the flow of water to your ice maker and dispenser. When it fails, you’re left with warm drinks, no ice, and sometimes a puddle on the kitchen floor. Most homeowners don’t think about this valve until something goes wrong, but understanding how it works and when to replace it can save you a service call and a few hundred dollars. This guide walks through everything you need to know about refrigerator water valves, from diagnosing problems to installing a new one yourself.
Table of Contents
ToggleKey Takeaways
- A water valve for refrigerator controls water flow to your ice maker and dispenser through an electrically controlled solenoid that opens when needed and closes when full.
- Common signs your water valve needs replacement include water leaks, no ice production, weak water dispenser flow, constant humming, and odd-tasting water with particles.
- Match your refrigerator’s make and model to the correct OEM or aftermarket valve part number before ordering, as specifications like voltage and outlet configuration vary by unit.
- Most homeowners can replace a refrigerator water valve in under an hour using basic tools by shutting off water and power, disconnecting lines, and installing the new valve following step-by-step instructions.
- Prevent valve failure by replacing water filters every six months, inspecting supply lines annually, maintaining proper water pressure (20–120 psi), and flushing the system monthly to avoid sediment buildup.
What Is a Refrigerator Water Valve and How Does It Work?
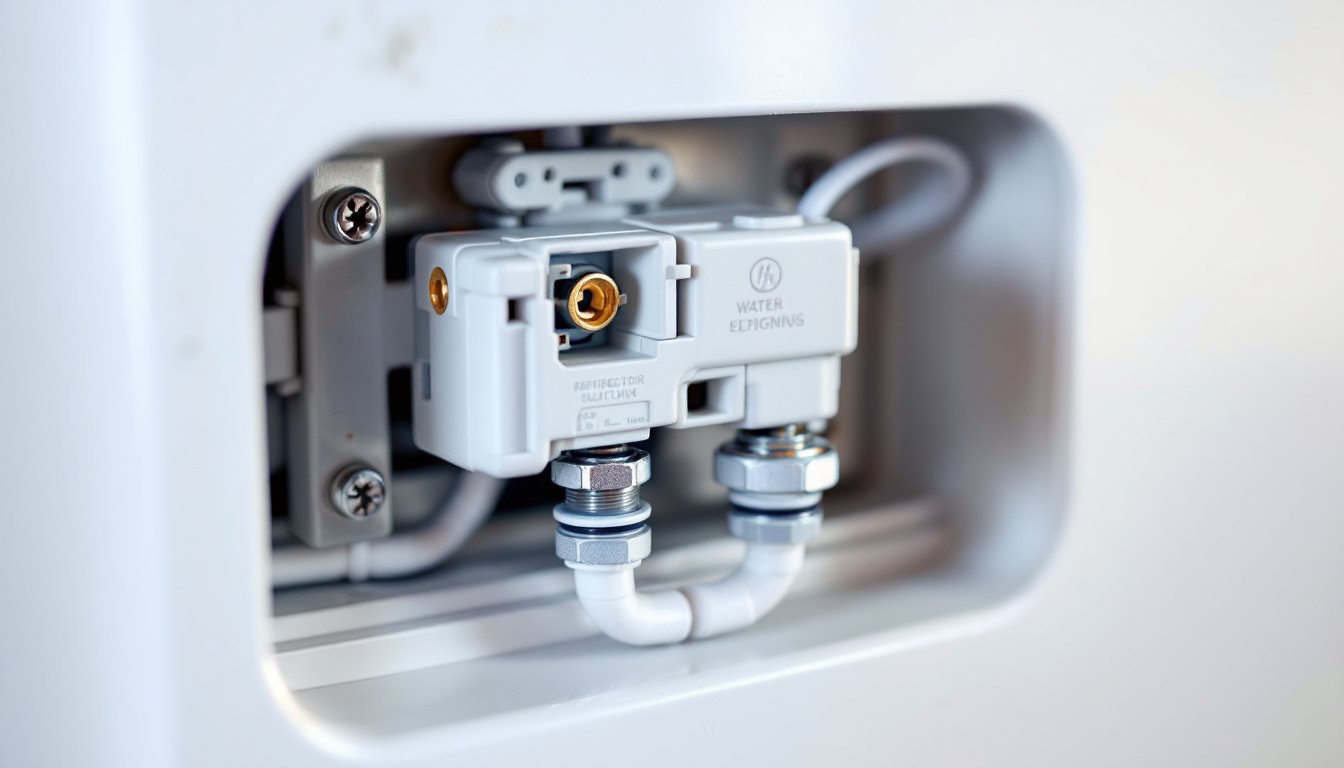
A refrigerator water valve, technically called a water inlet valve, is an electrically controlled valve that opens and closes to let water flow from your home’s supply line into the refrigerator. It’s typically mounted on the back of the unit, near the bottom, where the household water line connects.
The valve contains a solenoid (an electromagnetic coil) that receives a signal from the refrigerator’s control board when ice or water is needed. When activated, the solenoid opens the valve, allowing water to flow. Once the ice maker tray is full or the dispenser stops, the signal stops, the valve closes, and water flow halts.
Most residential water valves operate on standard household water pressure, between 20 and 120 psi. If your home’s water pressure falls below 20 psi, the valve may not open properly, resulting in slow ice production or weak water flow.
The valve itself is a straightforward mechanical device: an inlet port, outlet port (sometimes dual outlets for separate ice maker and dispenser lines), a solenoid, and a rubber or nylon diaphragm that seals the water passage. Over time, sediment, mineral buildup, or a failed solenoid can prevent the valve from closing fully, leading to leaks or constant dripping.
Signs Your Refrigerator Water Valve Needs Replacement
Knowing when to replace the valve can prevent bigger headaches down the road. Here are the most common symptoms:
Water leaking from the refrigerator. If water pools underneath or behind the unit, a stuck-open valve is a likely culprit. The valve should close completely when not in use. If the diaphragm wears out or debris lodges in the valve seat, water continues to flow.
No ice production or slow ice making. When the valve fails to open, the ice maker doesn’t get water. If your freezer temperature is correct and the ice maker arm isn’t stuck, the valve is the next thing to check.
Weak or no water from the dispenser. Low flow or complete stoppage can indicate a clogged or partially failed valve. Sometimes the solenoid energizes but the valve doesn’t fully open due to mineral deposits.
Constant humming or buzzing from the fridge. A failing solenoid can draw power continuously, creating a hum. If the valve is stuck closed, the solenoid may keep trying to energize without success.
Water tastes odd or has particles. A degraded valve can shed plastic or rubber bits into the water line. If you notice a plastic taste or small black specks in ice or water, the valve’s internal components may be breaking down.
Before replacing the valve, confirm your fridge water line shut off valve is fully open and your home’s water pressure is adequate. Sometimes what looks like a valve problem is actually a supply issue.
Choosing the Right Water Valve for Your Refrigerator
Not all refrigerator water valves are universal. You’ll need the correct part for your specific make and model.
OEM vs. aftermarket valves. OEM (original equipment manufacturer) parts are made by the refrigerator brand and guaranteed to fit. Aftermarket valves cost less, often half the price, but quality varies. If you’re working on a high-end unit or want the safest fit, go OEM. For budget repairs on older units, a reputable aftermarket valve works fine.
Single vs. dual outlet. Some refrigerators have separate water lines for the ice maker and dispenser, requiring a dual-outlet valve. Others use a single outlet with a splitter downstream. Check your current valve before ordering.
Voltage and compatibility. Most valves operate on 120V AC, but some models (especially older or compact units) may use different specs. Always match the part number from your refrigerator’s service manual or the label on the existing valve.
Where to buy. Appliance parts suppliers, big-box home improvement stores, and online retailers all carry these valves. Prices range from $15 to $80 depending on brand and features. If you’re unsure of the part number, many modern French door refrigerators have tech sheets taped inside the unit or printed on the back.
Write down your refrigerator’s model number (usually found on a sticker inside the fridge compartment or on the back panel) and cross-reference it with the valve part number to ensure compatibility.
How to Install a Refrigerator Water Valve: Step-by-Step Guide
Replacing a refrigerator water valve is a straightforward repair that most DIYers can handle in under an hour. You’ll need basic hand tools and a towel for spills.
Tools and Materials
- New water inlet valve (correct part number for your model)
- Adjustable wrench or 5/16″ and 1/4″ nut drivers
- Needle-nose pliers
- Towels or a shallow pan (to catch residual water)
- Headlamp or work light (the back of a fridge is dark)
- Safety glasses (recommended when working with pressurized lines)
Step-by-Step Installation
-
Turn off the water supply. Locate the ice maker water line shut off valve behind or beneath the refrigerator, or at the nearest wall connection. Turn it clockwise until it stops. If you can’t find a dedicated valve, you may need to shut off water to that section of the house.
-
Unplug the refrigerator. Pull the plug from the wall outlet. If the unit is hardwired (uncommon for residential fridges), turn off the breaker.
-
Pull the fridge away from the wall. You’ll need enough clearance to access the back panel. Have a helper if the unit is heavy or if you’re on tile or hardwood (use furniture sliders to avoid scratching).
-
Disconnect the water line. Use an adjustable wrench to loosen the compression nut connecting the household water line to the valve inlet. Keep a towel handy, some water will drip out.
-
Remove the valve cover or access panel. Most valves are behind a small plastic or metal cover secured by screws or clips. Remove these fasteners and set them aside.
-
Disconnect internal water lines. The valve has one or two small plastic or rubber tubes leading to the ice maker and dispenser. These are usually held by spring clips or compression fittings. Use needle-nose pliers to release the clips, then gently pull the tubing free. Label them if there are multiple outlets.
-
Unplug the wire harness. The valve has a two-prong electrical connector. Press the release tab and pull it straight off.
-
Remove the old valve. The valve is typically held by two screws or mounting clips. Remove these and slide the valve out of its bracket.
-
Install the new valve. Position the new valve in the mounting bracket, secure with screws, and reconnect the wire harness. Push the internal water tubes back onto the outlets until they click or seat fully, then reinstall the spring clips.
-
Reconnect the household water line. Thread the compression nut onto the new valve inlet and tighten by hand, then give it a quarter-turn with the wrench. Don’t overtighten, compression fittings seal with moderate pressure.
-
Restore power and water. Plug the fridge back in and slowly open the fridge water line shut off valve. Check for leaks around all connections. If you see drips, snug the fittings slightly.
-
Flush the system. Run a few cups of water through the dispenser to clear any air or debris. Discard the first batch of ice.
Many DIYers find detailed valve replacement guides helpful for model-specific nuances, especially on units with hidden screws or unusual mounting brackets.
Troubleshooting Common Water Valve Problems
Sometimes the valve isn’t the problem, or a simple fix can restore function without replacement.
Valve won’t open (no water or ice). First, confirm the fridge water line shut off valve is open and water pressure is at least 20 psi. Check for kinked or frozen water lines. If the solenoid clicks but no water flows, the valve screen (a small mesh filter inside the inlet) may be clogged with sediment. You can remove and clean it, though replacement is often easier.
Valve won’t close (continuous drip or leak). This usually means debris or mineral buildup is preventing the diaphragm from seating. You can try disassembling and cleaning the valve, but unless you’re confident in reassembly, replacement is safer and more reliable.
Intermittent operation. Loose electrical connections or a failing solenoid can cause the valve to work sporadically. Check the wire harness for corrosion or looseness. If the solenoid is weak, it may open inconsistently, replacement is the only fix.
Low water pressure. If your home’s water pressure is marginal, the valve may struggle to open fully. A booster pump or pressure regulator adjustment might help, but consult a plumber if you’re unsure about modifying your household plumbing.
Water tastes bad after replacement. New valves can shed small amounts of manufacturing residue. Flush at least a gallon through the dispenser and discard the first few batches of ice. If the taste persists, check your water filter, it may need replacement.
Maintenance Tips to Extend Your Water Valve’s Lifespan
A little preventive care goes a long way in keeping your refrigerator’s water system running smoothly.
Replace the water filter on schedule. Most manufacturers recommend changing filters every six months. A clogged filter forces the valve to work harder, increasing wear and reducing water flow. Mark your calendar or use a filter with a built-in timer.
Inspect the supply line annually. Check the household water line for cracks, brittleness, or kinks. Braided stainless steel lines are more durable than plastic and less prone to bursting.
Keep water pressure in range. Excessive pressure (above 120 psi) can damage the valve diaphragm. If your home pressure is high, consider a whole-house pressure regulator.
Flush the system periodically. Even if you’re not using the dispenser regularly, run water through it once a month to prevent stagnant buildup. This is especially important in vacation homes or second kitchens.
Avoid hard shutoffs. When turning off the ice maker water line shut off valve for repairs or during vacations, close it gently. Slamming valves shut can create pressure spikes that stress the inlet valve.
Clean the area behind the fridge. Dust and lint can clog ventilation and cause temperature fluctuations, which may lead to frozen water lines. Vacuum the condenser coils and floor area at least twice a year.
Conclusion
A functioning water valve is essential for enjoying the full convenience of your refrigerator’s ice and water features. Whether you’re troubleshooting a leak, installing a replacement, or just staying ahead of maintenance, the work is well within reach for most DIYers. With the right part, basic tools, and a methodical approach, you can restore reliable water flow and keep your fridge running efficiently for years to come.