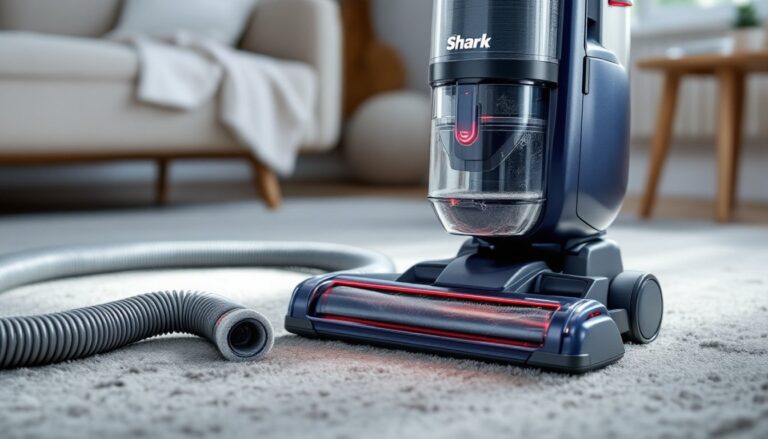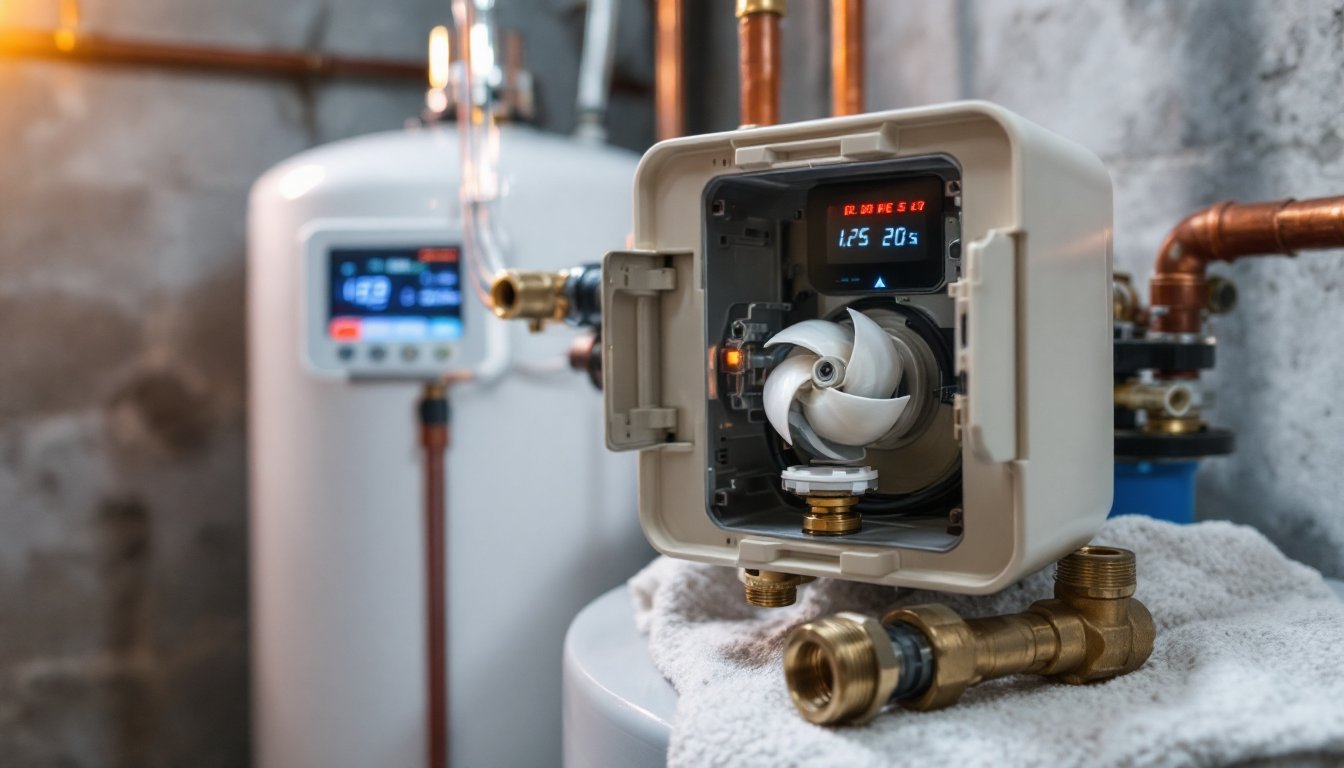
The control valve is the brain of your water softener, it manages regeneration cycles, monitors water usage, and keeps your system running efficiently. When it malfunctions, you might notice hard water stains creeping back, unusual noises during regeneration, or salt sitting untouched in the brine tank. Understanding how this component works and how to maintain it can save homeowners hundreds in repair calls and extend the life of the entire softening system. This guide walks through everything from basic operation to troubleshooting common failures, so you can keep softened water flowing without calling a plumber for every hiccup.
Table of Contents
ToggleKey Takeaways
- A water softener control valve orchestrates the ion-exchange process by directing water through service, backwash, brine draw, and rinse stages to remove hardness minerals efficiently.
- Choose between time-clock valves (simple, budget-friendly), metered valves (efficient, adapt to usage), or demand-initiated regeneration valves (predict soft water depletion and schedule regeneration automatically).
- Common control valve problems like stuck cycles, leaks, and rapid soft water depletion can often be resolved by checking power connections, inspecting O-rings, cleaning the venturi, and adjusting hardness settings.
- Quarterly maintenance—verifying bypass settings, inspecting brine lines, cleaning turbines, and documenting service dates—keeps your water softener control valve functioning reliably for years.
- Replace your control valve if leaks persist after seal replacement, regeneration becomes unreliable, parts are unavailable, or the unit exceeds 15 years old; modern metered models often pay for themselves through salt and water savings.
What Is a Water Softener Control Valve and How Does It Work?
The control valve sits at the top of a water softener tank and orchestrates the entire ion-exchange process. It directs water flow through different stages: service mode (when water flows through resin to remove hardness minerals), backwash (reversing flow to flush sediment), brine draw (pulling salt solution into the resin tank), and rinse (clearing excess brine).
Most modern control valves use either a mechanical timer or an electronic meter to trigger regeneration. Timer-based units regenerate on a set schedule, say, every three days at 2 a.m., regardless of actual water usage. Metered systems track gallons used and regenerate only when a predetermined volume has passed through, which conserves salt and water.
Inside the valve housing, you’ll find a piston or rotary disc that shifts positions to redirect water flow. Seals and O-rings keep water from leaking between ports. A small motor (in electronic models) or a clock mechanism (in mechanical versions) drives the piston through each regeneration stage, typically taking 90 to 120 minutes to complete a full cycle.
The valve also houses the bypass assembly, which lets you isolate the softener for maintenance without shutting off water to the entire house. Understanding this layout helps when diagnosing leaks or stuck cycles, you’ll know whether you’re dealing with a motor failure, a jammed piston, or just a blown O-ring.
Types of Water Softener Control Valves
Control valves fall into three main categories based on regeneration logic: time-clock, metered, and demand-initiated regeneration (DIR).
Time-clock valves regenerate on a fixed schedule. They’re simple and cheap but can waste salt and water if your usage drops. They work well for households with predictable routines, if you use roughly the same amount of water daily, a timer wastes minimal resources.
Metered valves count gallons and trigger regeneration based on capacity. They’re more efficient because they adapt to actual consumption. If you go on vacation, the system won’t regenerate needlessly. Most use a turbine or paddle wheel in the valve body to measure flow.
DIR valves combine metering with reserve capacity logic. They predict when you’ll run out of soft water and schedule regeneration just in time, usually at a low-demand hour like 2 a.m. This category includes brands using proprietary names like “Proportional Brining” or “Look-Ahead” technology.
Manual vs. Automatic Control Valves
Manual valves require the homeowner to initiate regeneration by turning a dial or lever. They’re rare in modern systems but still appear in commercial or industrial settings where an operator monitors hardness levels directly. Manual valves have fewer failure points, no electronics to short out, but demand vigilance to avoid running out of soft water.
Automatic valves handle regeneration without user input. They dominate the residential market because they’re set-and-forget. The tradeoff is complexity: circuit boards, solenoids, and sensors can fail, especially in humid basements or areas with power surges. Installing a surge protector on the outlet feeding your softener is cheap insurance against lightning or grid spikes frying the control board.
Common Water Softener Control Valve Problems and Solutions
Valve won’t regenerate. Check power first, plugs come loose, GFCIs trip, and breakers flip. If the display is dark, you’ve found your culprit. Next, verify the bypass isn’t engaged: some homeowners forget to return it to service mode after maintenance. On metered units, a stuck turbine from sediment buildup can prevent the controller from sensing flow. Remove the turbine, rinse it under a faucet, and reassemble.
Continuous regeneration or valve stuck in cycle. Often caused by a jammed piston or failed motor. You’ll hear the motor humming but no water flow changes. Power-cycle the unit by unplugging it for 30 seconds. If that doesn’t reset it, you may need to manually advance the cam or dial (consult your model’s manual). Persistent issues point to a worn drive motor or broken cam gear, both require replacement parts.
Leaking valve. Pinpoint the source: is water dripping from the bypass valve, seeping around the piston housing, or pooling under the brine line connection? Bypass leaks usually need a new O-ring or tightened compression fitting. Piston housing leaks often mean degraded seals inside the valve body, a rebuild kit with new seals and spacers runs $20 to $40 and takes an hour to install if you’re handy. Brine line leaks typically involve a loose nut or cracked tubing.
Soft water runs out too quickly. Your valve’s regeneration schedule or capacity settings might be off. Recalculate your household’s daily water usage (multiply occupants by 75 gallons) and your water hardness in grains per gallon (get a test kit or check your municipal report). Adjust the valve’s hardness setting and regeneration frequency accordingly. For homes with occasional high demand, houseguests, laundry day, bump the reserve capacity setting.
Error codes or flashing lights. Electronic valves often display fault codes when sensors detect anomalies. Common codes include low salt (check the brine tank), motor failure, or flow sensor errors. Your owner’s manual decodes these. If you’ve lost the manual, most manufacturers post PDFs online using the model number stamped on the valve body.
Safety note: Always wear safety glasses when working around pressurized plumbing. Water can spray when loosening fittings, and resin dust irritates eyes if you disturb the tank. Shut off the main water supply and relieve pressure by opening a downstream faucet before disassembling any valve components.
How to Maintain Your Water Softener Control Valve
Check the bypass and settings quarterly. Verify the bypass is in service position and that the clock (if timer-based) matches current time. Power outages can reset clocks, causing regeneration at inconvenient hours. On metered units, confirm the hardness and capacity settings haven’t drifted, they shouldn’t, but a curious kid or accidental button press can change them.
Inspect the brine line and venturi annually. The venturi is a small nozzle inside the control valve that creates suction to draw brine. It clogs with iron deposits, salt residue, or sediment. Remove it (usually accessible via a cap on the valve body), soak it in white vinegar for 20 minutes, and rinse. A clogged venturi prevents proper brine draw, leaving you with hard water even though salt sits unused in the tank.
Clean or replace the turbine or paddle wheel every two years. Sediment from well water or rusty pipes can gum up the flow sensor. Models like those found in whole-house filtration systems use similar turbine mechanisms that benefit from periodic cleaning. Unscrew the turbine housing, pull the wheel, and scrub with an old toothbrush. If the blades are cracked or the shaft wobbles, order a replacement, they cost $15 to $30.
Lubricate O-rings during rebuilds. If you’re replacing seals, apply a thin coat of silicone-based lubricant (not petroleum-based: it degrades rubber) to O-rings before installation. This prevents pinching and extends seal life.
Sanitize the resin bed and valve annually. Pour one cup of household bleach or a commercial resin cleaner into the brine tank and manually trigger a regeneration cycle. This kills bacteria and flushes iron buildup from the resin and valve passages. Follow with a second rinse cycle to clear chlorine taste.
Keep the area dry. Basements with high humidity accelerate corrosion on metal valve parts and can short circuit boards. A dehumidifier helps if you notice condensation on pipes or the softener housing.
Document maintenance dates. Tape a log sheet to the tank or brine cabinet. Note when you cleaned the venturi, replaced seals, or adjusted settings. This history helps identify patterns if problems recur and proves handy if you need warranty service.
When to Replace Your Control Valve: Warning Signs to Watch For
Frequent leaks even though new seals. If you’ve replaced O-rings and seals twice in a year and leaks keep returning, the valve body itself may be cracked or warped. Plastic housings can stress-crack from overtightening or freeze damage. Metal valves corrode in aggressive water conditions. Replacement beats endless patching.
Unreliable regeneration. When a valve skips cycles, regenerates randomly, or requires constant resets, the control board or cam mechanism is likely failing. Replacing circuit boards often costs 60% of a new valve, making full replacement more economical, especially on units over ten years old.
Parts unavailable. Manufacturers discontinue models every few years. If your valve needs a proprietary piston assembly or motor that’s no longer stocked, you’re forced to upgrade. Check parts availability before committing to a repair: installation guides often highlight which components are most critical.
Age over 15 years. Even well-maintained valves wear out. Plastic gears strip, springs weaken, and electronic components degrade. A modern valve offers better efficiency, quieter operation, and digital diagnostics that simplify troubleshooting. Replacement valves typically range from $150 for basic time-clock models to $400 for advanced metered units with Wi-Fi connectivity.
Upgrade opportunity. Switching from a timer to a metered valve saves salt and water, often paying for itself in two to three years. If you’re handy, valve replacement is a manageable DIY task: shut off water, depressurize the system, disconnect the old valve (usually four bolts and a handful of tubing connections), and reverse the process with the new unit. You’ll need an adjustable wrench, Teflon tape, and possibly a tubing cutter if lines need trimming.
Professional help. If the replacement involves soldering copper lines, modifying drain routing, or if local codes require a licensed plumber for backflow prevention devices, hire a pro. Permits aren’t typically required for like-for-like valve replacement, but adding a new softener or relocating one might trigger inspection requirements, check your jurisdiction’s rules.
Disposal note: Old control valves contain small amounts of electronic waste. Many communities accept them at e-waste recycling events. Don’t toss them in regular trash if circuit boards are involved.
Conclusion
The control valve rarely gets attention until something goes wrong, but routine maintenance, cleaning the venturi, checking seals, verifying settings, keeps it running for years. Recognizing early warning signs like slow regeneration or minor leaks lets homeowners address small issues before they cascade into expensive failures. Whether you’re troubleshooting a stuck piston or deciding between repair and replacement, understanding how this component works puts you in control of your water softening system instead of at the mercy of service call pricing.