Installing or replacing a washer and dryer outlet isn’t the most glamorous weekend project, but it’s one of the most critical for safety and appliance performance. Get it wrong, and you’re looking at tripped breakers, fire hazards, or an expensive service call. Get it right, and your laundry setup will run reliably for years. This guide walks through outlet types, electrical requirements, installation steps, and code compliance so homeowners can tackle the job confidently, or know when to call a licensed electrician.
Table of Contents
ToggleKey Takeaways
- Electric dryers require a dedicated 240-volt, 30-amp circuit with 10-gauge wire, while washing machines use standard 120-volt circuits, making correct washer and dryer outlet installation essential for safety and appliance performance.
- The NEC mandated 4-prong dryer outlets (NEMA 14-30R) in new construction since 1996 to provide a separate grounding conductor, offering better protection than older 3-prong designs that doubled neutral and ground functions.
- Before installing a washer and dryer outlet, confirm your local electrical codes require a permit, verify your breaker panel has capacity, and gather proper materials including NM-B cable, receptacles, breakers, and a voltage tester.
- Common outlet issues like tripped breakers, burnt receptacles, or failed heating elements signal overloads, arcing, loose connections, or undersized wiring—problems best resolved by a licensed electrician for safety-critical electrical circuits.
- Washing machine outlets must now have GFCI protection as of the 2020 NEC, while dryers do not currently require GFCI, though this safety standard may evolve in future code updates.
- Improper washer and dryer outlet installation risks fires, electrocution, and breaker trips, so homeowners uncertain about breaker panel work or circuit installation should hire a licensed electrician rather than risk hazardous DIY mistakes.
Understanding Washer and Dryer Electrical Requirements
Washers and dryers have different power needs, and confusing them can damage equipment or create hazards.
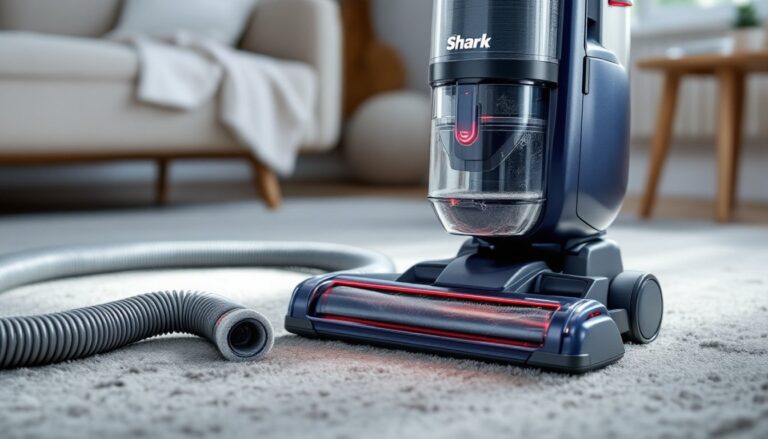
Washing machines typically run on standard 120-volt, 15- or 20-amp circuits using a grounded three-prong outlet (NEMA 5-15R or 5-20R). They draw relatively low current, usually 5 to 15 amps, so they can share a circuit with other appliances in some cases. But, the National Electrical Code (NEC) recommends a dedicated circuit for large appliances to prevent overloads.
Electric dryers are power-hungry. They require a dedicated 240-volt circuit, typically rated at 30 amps. This higher voltage is necessary to generate the heat needed for efficient drying. Gas dryers still need electricity for the drum motor, controls, and igniter, but they run on a standard 120-volt circuit like a washer.
Understanding these differences is essential before purchasing appliances or planning electrical work. Modern washer and dryer electrical requirements specify both voltage and grounding standards that have evolved over decades to improve safety.
Wire gauge matters. For a 30-amp, 240-volt dryer circuit, use 10-gauge wire (copper or aluminum equivalent). Undersized wire overheats under load and poses a fire risk. For 120-volt washer circuits, 14-gauge wire suffices for 15-amp circuits, while 12-gauge is required for 20-amp circuits.
Always confirm your appliance’s nameplate data before starting work. Amp draw, voltage, and plug configuration are listed on a metal tag inside the door or on the back panel.
Types of Washer and Dryer Outlets Explained
Outlet types for dryers have changed significantly due to code updates. Knowing which you have, and which you need, prevents compatibility headaches.
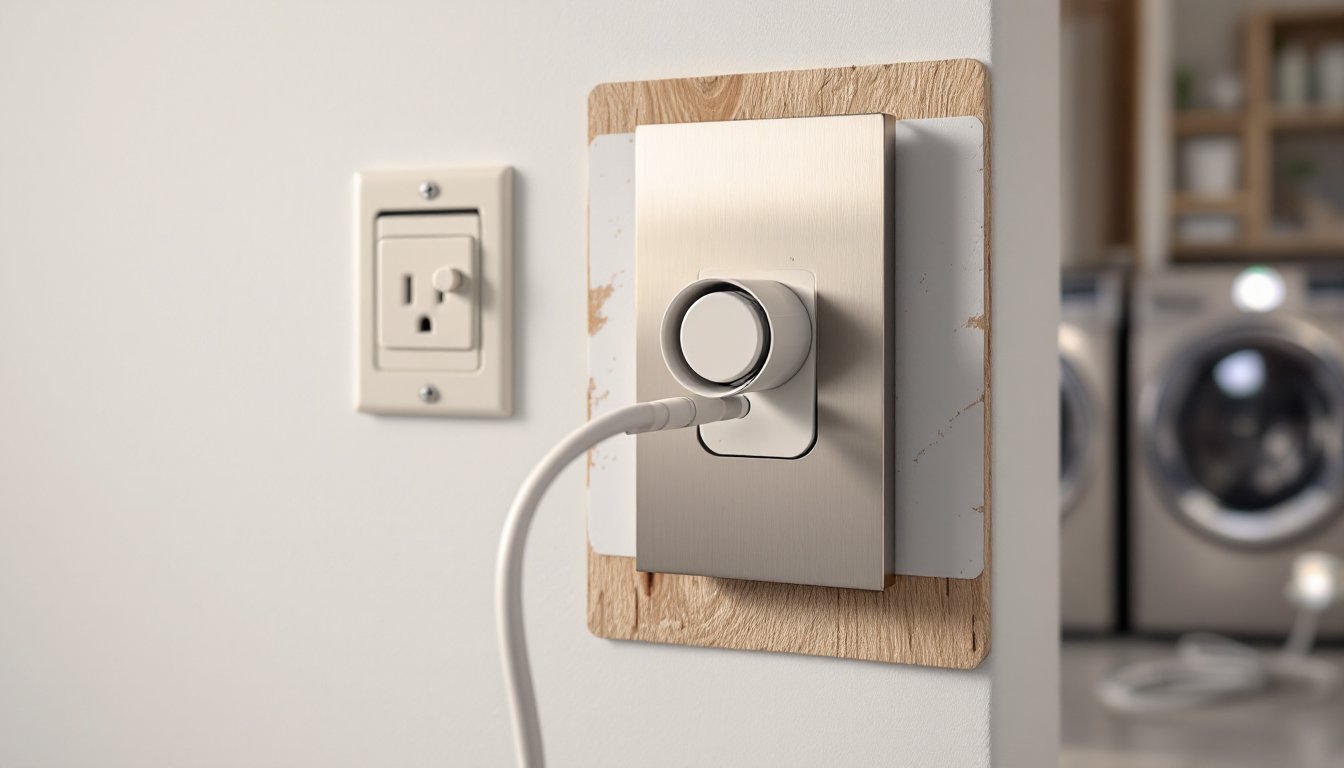
Washer outlets are straightforward: a standard grounded NEMA 5-15R (15-amp) or 5-20R (20-amp) receptacle. These are the same outlets used throughout most homes. No special configuration required.
Dryer outlets come in two main varieties, and the difference hinges on grounding.
3-Prong vs. 4-Prong Dryer Outlets
3-prong outlets (NEMA 10-30R) were the standard until the late 1990s. They have two hot wires and one neutral wire, with no dedicated ground. The neutral wire served double duty as both the return path for current and the grounding conductor. This setup worked but wasn’t ideal, if the neutral wire failed, the dryer frame could become energized.
4-prong outlets (NEMA 14-30R) became mandatory for new construction in 1996 under NEC code changes. They include two hot wires, one neutral, and a separate ground wire. This isolates the grounding path from the current-carrying neutral, reducing shock and fire risks.
If you’re installing a dryer in a home built before 1996, you might have a 3-prong outlet. The NEC doesn’t require retrofitting existing 3-prong outlets to 4-prong in most jurisdictions, but if you’re running new wiring, you must install a 4-prong receptacle.
Plug adapters exist but aren’t always code-compliant. Some dryers ship with a 4-prong cord but can accept a 3-prong cord if you move the internal ground strap. Check your dryer’s installation manual and local codes before making changes.
Installing the right outlet from the start saves time and ensures your setup meets current safety standards, especially if you plan to sell your home.
How to Install a Washer and Dryer Outlet
Installing a dryer outlet is an intermediate electrical project. If you’re comfortable working inside your breaker panel and running cable through walls, it’s doable. If not, hire a licensed electrician, improper wiring can cause fires or electrocution.
Before starting:
- Check local building codes and confirm whether a permit is required. Many jurisdictions require permits for new circuits.
- Ensure your panel has capacity for an additional 30-amp, 240-volt breaker (dryer) or 20-amp, 120-volt breaker (washer).
- Gather materials: 10/3 NM-B cable (for dryer), 12/2 or 14/2 NM-B (for washer), appropriate receptacle, metal or plastic electrical box, cable clamps, and a two-pole 30-amp breaker (dryer) or single-pole breaker (washer).
Tools needed:
- Wire stripper
- Voltage tester
- Drill with bits
- Fish tape (if running cable through finished walls)
- Screwdrivers
- Needle-nose pliers
Step-by-step installation (for a 4-prong dryer outlet):
- Shut off the main breaker at the panel. Confirm power is off using a voltage tester.
- Run 10/3 NM-B cable from the breaker panel to the outlet location. This cable contains a black (hot), red (hot), white (neutral), and bare copper (ground) wire. Secure the cable every 4.5 feet and within 12 inches of boxes per NEC 334.30.
- Install the electrical box at the outlet location, typically 3 to 4 feet above the floor for easy access. Secure it to a stud.
- Strip the cable sheathing back about 8 inches inside the box. Strip individual wire insulation ½ inch.
- Connect wires to the receptacle: black and red to the brass terminals (hot), white to the silver terminal (neutral), and bare copper to the green screw (ground).
- Secure the receptacle in the box and attach the cover plate.
- At the breaker panel, connect the black and red wires to a new 30-amp, two-pole breaker. Connect the white wire to the neutral bus bar and the ground wire to the grounding bus bar.
- Turn the main breaker back on, then switch on the new dryer breaker. Test the outlet with a multimeter, you should read approximately 240 volts between the two hot terminals and 120 volts from each hot to neutral.
For washer outlets, the process is similar but simpler: run 12/2 or 14/2 cable, install a standard grounded receptacle, and connect to a 20-amp or 15-amp single-pole breaker.
Many installation guides provide visual walkthroughs, which can be helpful for first-timers.
Common Outlet Problems and Troubleshooting Tips
Even correctly installed outlets can develop issues over time. Here’s how to diagnose and fix the most common problems.
Dryer won’t start or runs but doesn’t heat:
Check that the plug is fully seated in the outlet. A loose connection can prevent one of the hot wires from making contact, which may allow the motor to run but not the heating element. Inspect the outlet for scorch marks or melted plastic, signs of arcing or overheating. If present, replace the receptacle and check wire connections.
Tripped breaker:
A dryer breaker that trips repeatedly signals an overload, short circuit, or ground fault. First, unplug the dryer and reset the breaker. If it holds, the issue is likely with the appliance (heating element shorted to ground, motor failure). If it trips immediately, inspect the circuit wiring for damage.
Washer outlet not working:
Use a voltage tester to confirm power at the outlet. If there’s no voltage, check the breaker. If the breaker is on but the outlet is dead, there may be a loose wire connection at the outlet, a tripped GFCI upstream (if applicable), or a break in the circuit.
Burnt or discolored outlet:
This is a serious issue. Overheating usually results from loose terminal screws, undersized wire, or a poor-quality receptacle. Turn off the breaker, remove the outlet, and inspect all connections. Replace the receptacle with a commercial-grade or spec-grade unit, they have better clamping force and heat resistance than cheap residential-grade receptacles.
Plug doesn’t fit the outlet:
If you’ve moved and your dryer plug doesn’t match the wall outlet, you have a few options: replace the dryer cord to match the outlet, replace the outlet to match the cord (if permitted by code), or install an adapter (check local codes first). Never force a plug or modify prongs.
For recurring issues, consult a licensed electrician. Electrical problems don’t fix themselves, and small issues can escalate quickly.
Safety Considerations and Code Compliance
Electrical work carries real risk. Following safety protocols and code requirements isn’t optional, it’s how you avoid fires, shocks, and injuries.
Always shut off power at the breaker before working on any circuit. Use a non-contact voltage tester to double-check that wires are de-energized. Don’t rely on breaker labels, test every time.
Wear appropriate PPE: safety glasses, work gloves, and rubber-soled shoes. If drilling or cutting, use a dust mask and ear protection.
Use the correct wire size. Undersized wire is a leading cause of residential electrical fires. A 30-amp dryer circuit requires 10-gauge copper wire (or 8-gauge aluminum). Never use a smaller gauge.
Ground everything. Modern codes require a separate equipment grounding conductor for all 240-volt appliances. Never use a neutral wire as a ground.
Outlet height and placement: NEC doesn’t specify a required height for dryer outlets, but 3 to 4 feet above the floor is typical for accessibility. Ensure the outlet is within reach of the dryer cord, most cords are 4 to 6 feet long.
GFCI protection: As of the 2020 NEC, washing machine outlets must be GFCI-protected in dwelling units. This can be a GFCI breaker or a GFCI receptacle. Dryers don’t currently require GFCI protection, but that may change in future code cycles.
Permits and inspections: Many jurisdictions require an electrical permit for new circuits or outlet installations. Pulling a permit isn’t just red tape, it ensures an inspector reviews your work. That’s cheap insurance compared to a house fire. Unpermitted work can also complicate home sales or insurance claims.
While resources like Popular Mechanics cover a range of DIY projects, electrical work sits at the edge of what many homeowners should tackle solo. Know your limits. If you’re uncertain about any step, especially work inside the breaker panel, call a pro.
Arc-fault protection isn’t required for laundry circuits under current NEC, but some electricians install AFCI breakers as an added safety layer, especially in remodels.
Conclusion
A properly installed washer and dryer outlet is a long-term investment in safety and appliance longevity. Whether upgrading from a 3-prong to a 4-prong dryer receptacle, running a new dedicated circuit, or troubleshooting an existing outlet, attention to wire sizing, grounding, and code compliance pays off. DIYers with solid electrical skills can handle the work, but there’s no shame in hiring a licensed electrician for complex or high-risk tasks.