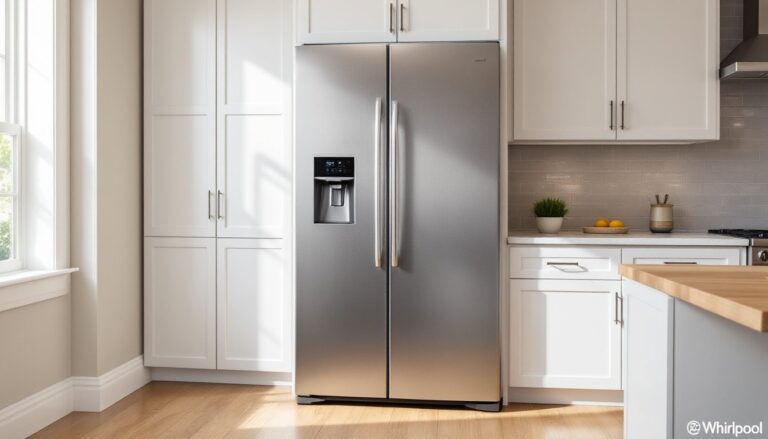
Hard water is costing you money, not just in detergent, but in the slow death of your washing machine. If you’ve noticed mineral buildup around faucets, stiff towels, or faded clothes, you’re dealing with calcium and magnesium deposits that corrode appliances and wreck fabric. A washing machine water softener tackles the problem at the source, protecting your investment and delivering cleaner laundry without the residue. Installing one isn’t complicated, but choosing the right type and maintaining it properly makes all the difference. This guide walks through what works, what doesn’t, and how to get it done.
Table of Contents
ToggleKey Takeaways
- Hard water causes mineral buildup that reduces washing machine heating efficiency by up to 25%, damages seals, and shortens appliance lifespan while degrading fabric quality and color.
- A water softener for washing machine using ion-exchange technology removes calcium and magnesium minerals before they enter the drum, delivering cleaner laundry and protecting your investment.
- Inline ion-exchange softeners are more reliable for very hard water (above 10 grains per gallon), while magnetic descalers offer a non-invasive, renter-friendly option best suited for mild to moderate hardness.
- Installation of an inline water softener is a DIY-friendly two-hour project requiring basic tools, with no permits needed in most areas, but always verify local plumbing codes.
- Regular maintenance including resin regeneration every 6–12 months, quarterly seal inspections, and annual sanitization keeps your softener functioning optimally and extends both system and washer lifespan.
- A water softener typically costs $100–$400 installed and pays for itself through reduced detergent use (up to 50% less needed), lower energy bills, and avoiding expensive appliance repairs.
Why Your Washing Machine Needs a Water Softener
Hard water contains dissolved minerals, primarily calcium carbonate and magnesium sulfate, that form scale when heated or left standing. Your washing machine’s heating element is a magnet for this buildup. Over time, scale reduces heating efficiency, clogs hoses, damages seals, and shortens the appliance’s lifespan. The average washing machine heating element with heavy scale deposits can lose up to 25% efficiency, driving up energy costs.
Fabric suffers, too. Minerals bond with detergent molecules instead of dirt, leaving clothes dull, scratchy, and dingy. You’ll compensate by using more detergent, which creates its own residue problem and can damage internal components over time. Whites turn gray, colors fade faster, and towels lose absorbency because mineral deposits coat fibers.
Beyond the machine itself, hard water forces you to use hotter wash cycles and extra rinses to get adequate cleaning. That’s wasted water, wasted energy, and faster wear on fabrics. A water softener eliminates the mineral content before it enters the drum, so detergent works as intended, heating elements stay clean, and clothes come out softer without fabric softener additives.
If your municipal water supply registers above 7 grains per gallon (gpg) hardness, considered moderately hard, you’ll see measurable benefits from softening. Test kits are available at hardware stores for under $15, or check your local water utility’s annual report for hardness data. Anything above 10 gpg is classified as very hard and will aggressively scale appliances.
Types of Water Softeners for Washing Machines
Not all softening systems work the same way. The two main categories, inline ion-exchange units and magnetic/electronic descalers, differ in installation, effectiveness, and cost. Choose based on your water hardness level, plumbing setup, and whether you want to treat just the washer or multiple fixtures.
Inline Water Softener Systems
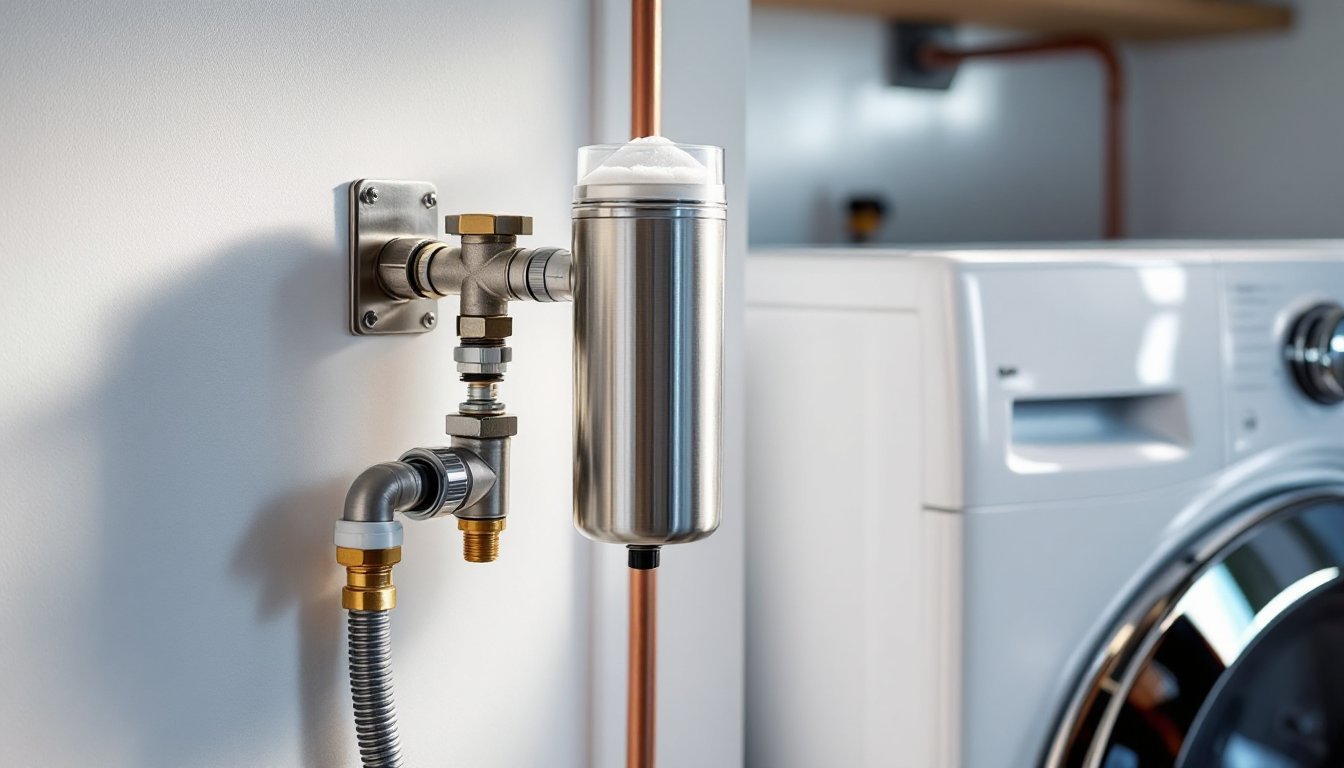
Inline units install directly on the cold water supply line feeding the washing machine. They use ion-exchange resin to swap calcium and magnesium ions for sodium or potassium ions, physically removing hardness minerals from the water. This is the same technology whole-house softeners use, scaled down for a single appliance.
Most inline models are compact cylinders, roughly 10–14 inches tall and 4–5 inches in diameter, mounted on the wall behind the washer. Typical capacity ranges from 16,000 to 32,000 grains, sufficient for 6–12 months of laundry use in a household of four with moderately hard water. When the resin bed is exhausted, you regenerate it with salt or potassium chloride following the manufacturer’s instructions, usually a simple process involving a brine solution poured into a reservoir.
Installation requires cutting the supply line and adding compression fittings or 3/4-inch NPT threaded connections. You’ll need an adjustable wrench, pipe cutter or hacksaw, and Teflon tape for threads. Shut off the main water supply and the washing machine shutoff valve before cutting. Mount the unit securely to wall studs with lag screws, these units weigh 8–15 pounds when full and create vibration during water flow.
Inline systems deliver genuine softening, measurable with a test kit before and after installation. They’re the most reliable option for very hard water and provide consistent results. The downside is the need for periodic regeneration and the addition of sodium to wash water, which some users avoid for health or environmental reasons. Potassium chloride is a salt-free alternative but costs roughly double.
Magnetic and Electronic Descalers
Magnetic descalers clamp onto the outside of the supply pipe without cutting or fittings. They claim to alter the structure of mineral crystals so they don’t adhere to surfaces. Electronic (or electromagnetic) descalers work similarly but use a powered coil to generate a fluctuating magnetic field. Both are non-invasive, require no regeneration, and add no sodium.
Installation is dead simple: wrap the device around the pipe according to the template, tighten set screws, and plug in the power cord (for electronic models). No plumbing skills required, and you can move the unit if you relocate the washer. They’re popular with renters and DIYers who want a no-commitment solution.
The catch? Effectiveness is inconsistent and debated. These devices don’t remove minerals, they attempt to keep them suspended so they rinse away instead of forming scale. Many home improvement guides note mixed results depending on water chemistry, flow rate, and pipe material. They work better as scale preventers on new appliances than as remedies for existing buildup. If your water hardness exceeds 15 gpg, don’t expect meaningful softening. But, for mild to moderate hardness or as a supplement to periodic descaling, they’re low-risk and inexpensive ($40–$150).
One legitimate benefit: they won’t add sodium, making them suitable for households on low-sodium diets or using greywater systems for irrigation. But if you need verifiable softening for very hard water, stick with ion-exchange.
How to Install a Water Softener on Your Washing Machine
Installing an inline water softener is a straightforward plumbing task most DIYers can handle in under two hours. You’ll need basic tools and attention to detail, this is pressure plumbing, so leaks are possible if connections aren’t tight. Always check local codes: some jurisdictions require a licensed plumber for modifications to water supply lines, especially in condos or multi-family buildings.
Tools and materials:
- Inline water softener unit (sized for your household)
- Adjustable wrench or channel locks
- Pipe cutter or hacksaw
- Teflon tape (PTFE thread seal tape)
- Bucket and towels (for residual water)
- Stud finder and lag screws (if wall-mounting)
- Safety glasses
Step-by-step installation:
-
Shut off water. Turn off the main water supply or the dedicated shutoff valve for the washing machine (usually a quarter-turn ball valve behind the unit). Open the washer’s hot and cold faucets to relieve pressure and drain residual water into a bucket.
-
Disconnect the cold supply hose. Unscrew the hose from the wall outlet using an adjustable wrench. Have a towel ready, some water will spill. If the hose washers are cracked or flattened, replace them now.
-
Cut or adapt the supply line. If your setup uses rigid copper or PEX, cut the pipe at a convenient point, ideally 12–18 inches from the wall for working room. Use a pipe cutter for clean, square cuts. If you have a flexible hose, you may adapt with a 3/4-inch hose-to-NPT adapter instead of cutting, depending on the softener’s inlet configuration.
-
Mount the softener. Use a stud finder to locate wall studs. Mark holes per the unit’s mounting bracket, drill pilot holes, and drive lag screws. The unit should be level and firmly anchored, vibration from water flow can loosen poorly secured mounts.
-
Connect inlet and outlet. Wrap male threads with 2–3 wraps of Teflon tape, spiraling in the direction of the thread (clockwise when viewing the end). Thread the inlet to the supply side and the outlet toward the washer. Hand-tighten, then snug with a wrench, about 1/4 to 1/2 turn past hand-tight. Over-tightening can crack plastic housings.
-
Restore water and check for leaks. Slowly open the shutoff valve and inspect all connections. Tighten any seeping joints. Run a test wash cycle and monitor the system for the first 10 minutes.
-
Prime the resin bed (if applicable). Some models ship with dry resin that requires an initial flush cycle or saltwater charge. Follow the manual, skipping this step reduces softening capacity.
Permit and code notes: Most areas classify this as a minor appliance modification that doesn’t require a permit, but confirm with your local building department if you’re uncertain. The International Plumbing Code (IPC) doesn’t specifically regulate single-appliance softeners, but any work affecting potable water should meet sanitary standards. If you’re in a jurisdiction following the Uniform Plumbing Code (UPC), backflow prevention may be required: check if your softener has a built-in check valve.
If you’re not confident working with pressurized water lines or your setup involves galvanized steel or unusual fittings, hire a licensed plumber. A botched connection can cause water damage that far exceeds the cost of professional installation.
Maintenance Tips for Maximum Performance
A water softener isn’t install-and-forget. Regular maintenance keeps the resin active, prevents bacterial growth, and extends both the softener’s and the washing machine’s service life. Neglect leads to channeling (water bypassing spent resin), salt bridges, and eventual failure.
Regeneration schedule: For ion-exchange inline units, regenerate the resin bed every 6–12 months depending on hardness and usage. A family of four doing 8–10 loads per week with 10 gpg water should regenerate around the 6-month mark. Mix a brine solution per the manufacturer’s ratio, commonly 1 cup salt per gallon of water, and pour it into the unit’s reservoir or backwash port. Let it sit for the specified contact time (usually 2–4 hours), then flush thoroughly. Mark regeneration dates on a calendar: inconsistent timing reduces effectiveness.
Inspect seals and fittings: Every three months, check inlet and outlet connections for moisture, corrosion, or white crust (dried mineral deposits). Tighten any weeping joints and replace worn hose washers. If you see greenish stains on copper fittings, you may have acidic water or galvanic corrosion: consult a plumber.
Clean pre-filters: If your unit includes a sediment pre-filter (common in models for well water), rinse or replace the cartridge every 3–6 months. Sediment clogs resin and reduces flow rate. A clogged filter also increases water pressure on the softener housing, risking cracks.
Sanitize the resin bed annually: Over time, organic matter and bacteria can colonize the resin. Once a year, run a sanitizing flush using a solution of 1/4 cup unscented household bleach per gallon of water (check your manual, some resins are sensitive to bleach and require a hydrogen peroxide solution instead). Circulate the sanitizer, let it sit for 20–30 minutes, then flush with multiple cycles of fresh water until there’s no chlorine odor.
Monitor soap and detergent use: Softened water requires significantly less detergent, often 50% less than the bottle recommends. Over-sudsing leaves residue and can cause overflow in high-efficiency (HE) washers. Start with half the recommended dose and adjust based on results.
Safety note: Always wear nitrile gloves when handling salt, resin, or sanitizing chemicals. If your unit uses potassium chloride instead of sodium, avoid inhaling dust, potassium chloride is a mild respiratory irritant.
Conclusion
A washing machine water softener is a modest investment, typically $100–$400 installed, that pays back in appliance longevity, lower detergent costs, and better laundry results. Choose an inline ion-exchange system for proven softening or a magnetic descaler for a no-commitment trial. Install it correctly, keep up with regeneration, and your machine will thank you with years of scale-free operation. Skip the softener, and you’ll pay in repairs, replacement parts, and the slow grind of hard water damage.