Windows fail piece by piece, not all at once. A cracked balance spring, a stripped operator gear, a worn weatherstripping channel, these failures don’t mean you need a full window replacement. Most homeowners can track down and install individual parts for a fraction of the cost of new units, whether they’re working with vinyl double-hungs from the ’90s or wood casements from the ’50s. The catch? You need to know what you’re looking for, where to find it, and how much disassembly your repair actually requires. This guide walks through the most common window parts that fail, how to identify your exact components, and when you can tackle the fix yourself versus when to call a pro.
Table of Contents
ToggleKey Takeaways
- Window replacement parts like balances, operators, and weatherstripping can be installed individually to extend window life for decades at a fraction of full replacement costs.
- Accurate identification of your window brand, model, and failed component is essential; manufacturer labels, measurements, and photos help match the exact part you need.
- Common window replacement parts include sash balances (spiral, block-and-tackle, constant-force, or rope-and-weight), casement operators, locks, and weatherstripping, each with unique replacement procedures.
- Manufacturer websites, specialized online suppliers like Swisco and Blaine Hardware, and local glass shops offer the best sourcing options depending on window age and availability.
- Most DIY window part installations—sash replacement, operator installation, reglazing, and IGU swaps—are achievable with basic tools and patience, though structural repairs and second-story work warrant professional help.
Understanding Common Window Replacement Parts
Before you can fix a window, you need to speak its language. Window components fall into two broad categories: structural elements (sashes, frames, panes) and hardware (locks, balances, operators). Knowing which category your failed part belongs to determines how complex the repair becomes.
Sashes, Frames, and Panes
The sash is the moving portion of the window that holds the glass. On a double-hung window, you’ve got an upper and lower sash. On a casement, the entire sash swings outward on hinges. Sashes are built from stiles (vertical sides), rails (horizontal top and bottom), and muntins (grids that divide panes).
The frame is the stationary perimeter anchored into your wall framing. It includes the jambs (sides), head (top), and sill (bottom). The frame houses the channels or tracks that guide sash movement and secure the weatherstripping.
Glass panes sit in glazing channels within the sash, held in place by glazing compound (putty), glazing tape, or snap-in vinyl stops depending on window age and type. Insulated glass units (IGUs) are factory-sealed double or triple panes: if the seal fails and you see condensation between panes, the entire IGU needs replacement, you can’t separate and re-seal individual layers.
Older wood windows often use single-pane glass set in putty, which makes pane replacement straightforward if time-consuming. Modern vinyl or aluminum windows use IGUs that snap or screw into the sash, making glass replacement faster but requiring exact size matching.
Hardware Components: Locks, Hinges, and Operators
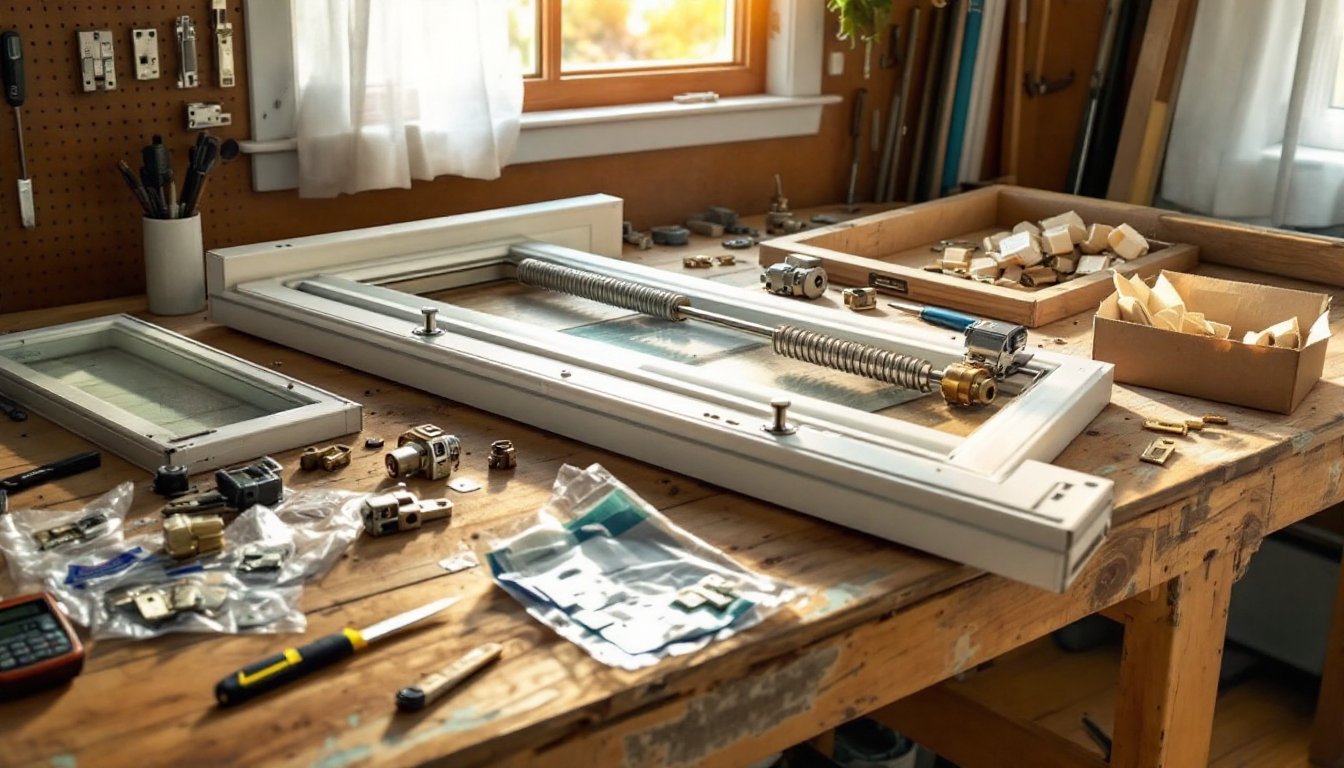
Balance systems counterweight the sash so it stays open at any height. Double-hung windows use one of four types: spiral balances (coiled rod inside a tube), block-and-tackle balances (pulley system with a cord and spring cassette), constant-force balances (coiled metal tape), or traditional rope-and-weight (cast-iron weights in the wall cavity). Each type has unique replacement procedures and parts that aren’t interchangeable.
Locks and keepers secure the window closed. Cam locks (the rotating lever on double-hungs) and their strike plates wear out or break. Casement windows use multi-point locks that engage at several points along the frame. Locks are often manufacturer-specific, especially on newer vinyl windows.
Operators open and close casement, awning, or hopper windows. The crank handle connects to a gear mechanism that extends an arm (called a scissor or track arm) to push the sash open. Gears strip, arms bend, and handles snap off, all are replaceable, but you’ll need to match the arm length and attachment style.
Weatherstripping seals gaps between moving parts. It comes as foam tape, V-strip, bulb seals, or fin seals depending on window type. Worn weatherstripping causes drafts and condensation but is one of the easiest parts to replace. Many home renovation tutorials detail re-weatherstripping for energy efficiency gains.
Tilt latches on modern double-hungs let you pivot the sash inward for cleaning. These plastic clips break frequently but are inexpensive and snap into place without tools.
How to Identify Which Window Parts You Need
Generic “window balance” or “casement operator” searches rarely turn up the right part. Window hardware is manufacturer- and model-specific, especially for anything made after 1980.
Start by locating any manufacturer labels on the window. Check the top or side of the sash, inside the jamb channel, or on the spacer bar between IGU panes. You’re looking for a brand name (Andersen, Pella, Marvin, Atrium, etc.) and ideally a model or series number.
If there’s no label, measure the failed part carefully. For balances, measure the metal tube length (not including the mounting bracket). For operators, measure the track arm from the pivot point to the attachment clip when fully retracted, and note how many attachment points it has. For IGUs, measure width and height to the nearest 1/16 inch and note the glass thickness.
Take clear photos from multiple angles, including close-ups of mounting hardware, attachment clips, and any stampings or part numbers on the component itself. Many suppliers can identify parts from photos when measurements alone aren’t conclusive.
For balances, you’ll also need to know the sash weight. Remove the sash (usually by tilting it inward and lifting out of the jamb channels), then weigh it on a bathroom scale. Balance strength is rated in pounds, and using the wrong strength means the window won’t stay open or will slam shut.
Count how many parts you need before ordering. Most double-hung windows use two balances (one per side), but some wider units use four. Casement operators are typically one per window, but you might also need the crank handle, the operator cover, or the hinge assemblies if those are damaged.
If you’re struggling with identification, remove the failed part first and bring it to a window supply shop or use it for online comparison. Trying to match parts while they’re still installed often leads to ordering the wrong components.
Where to Buy Quality Window Replacement Parts
The best source depends on your window’s age and brand.
Manufacturer direct works well for windows less than 20 years old from major brands. Andersen, Pella, Marvin, and Milgard all sell parts through their websites or authorized dealers. You’ll pay more, but you’re guaranteed correct fitment. Call their customer service with your model number: they can look up part diagrams and tell you exactly what you need.
Specialized online suppliers like Blaine Hardware, Swisco, and Prime-Line stock thousands of generic and OEM parts. They’re especially useful for discontinued models or off-brand windows. Their sites usually have identification tools where you measure and photograph your part, then filter results. Shipping is fast, but returns can be tricky if you order the wrong part.
Local glass and window shops often carry common parts like tilt latches, balances, and weatherstripping. They can also fabricate custom glass if your IGU size is unusual. The advantage is hands-on help with identification, bring your part in and they’ll match it on the spot. Pricing is higher than online, but you save on shipping and get immediate answers.
Big-box home centers (Lowe’s, Home Depot) stock limited generic hardware: standard screen replacement kits, adhesive weatherstripping, and a few common lock styles. Don’t expect them to have your exact balance or operator unless you have a very common window model.
Salvage yards and Habitat ReStores are long shots but worth checking if you’re working on historic windows. You might find matching hardware or a donor window you can cannibalize for parts. This approach works best for pre-1960s wood windows where standardization was minimal.
When ordering online, check return policies carefully. Many suppliers charge restocking fees (15-25%) on special-order or cut-to-length parts. If you’re not 100% certain of your match, order from a supplier with free returns or at least reasonable restocking terms.
Buy replacement parts in sets when possible. If one balance failed, its mate isn’t far behind. If you’re replacing a casement operator, inspect the hinges and arm at the same time, you don’t want to reassemble everything only to have a hinge fail a week later.
DIY Installation Tips for Window Replacement Parts
Most window part replacements are approachable DIY projects if you’re methodical and patient. That said, some jobs require a second set of hands or specialized tools.
Safety first: Wear safety glasses anytime you’re removing glass or working with springs under tension. Balances and operators store energy that can release suddenly. Work gloves protect against sharp metal edges and broken glazing compound.
Replace balances by first removing the sash. On tilt-style double-hungs, press the tilt latches and pivot the sash inward, then lift up to disengage it from the balance attachments. Slide out the old balance from its jamb channel. The new balance slides into the same slot and clips or screws to the sash. Adjust the balance tension if there’s a screw adjustment at the top of the tube, tighten for heavier sashes, loosen for lighter ones. This is detailed in many DIY repair tutorials that cover seasonal maintenance.
If you have rope-and-weight balances in an old double-hung, replacement means accessing the weight pockets inside the jamb. You’ll remove a small access panel (often painted shut), pull out the cast-iron weights, replace the sash cord, and rethread it over the pulleys. It’s tedious but not difficult. Leave the weights in place if they’re functional, just replace the cord with braided nylon sash cord, not cotton or poly rope.
Installing a new casement operator requires removing the interior trim or operator cover to access the mounting screws. Disconnect the old arm from the sash track, unscrew the operator from the frame, and reverse the process with the new unit. The trickiest part is aligning the arm with the track clip on the sash, have a helper hold the window partway open while you reconnect the arm.
Reglazing a wood sash takes patience. Scrape out old putty with a putty knife or chisel, pull glazing points with pliers, remove the glass, clean the rabbet (the recessed channel), apply a thin bed of glazing compound or tape, set the new pane, press in new glazing points every 6-8 inches, then apply a fresh bead of compound and tool it smooth with a putty knife. Allow 7-14 days for oil-based glazing compound to skin over before painting. Latex glazing compound skins faster but doesn’t hold up as long in weather.
IGU replacement in vinyl or aluminum sashes is faster: remove vinyl stops (they usually pop out with a putty knife), lift out the old unit, clean the glazing channel, set the new IGU on setting blocks (small plastic spacers that center the glass and allow drainage), and snap the stops back in. Don’t over-tighten screws if your stops are screw-mounted, you can crack the glass.
When to call a pro: Full-frame window replacement, structural repairs to rot-damaged sills or jambs, and anything involving flashing or water intrusion behind the window should go to a licensed contractor. If you’re not comfortable working on a ladder for second-story windows, hire it out. If your municipality requires a permit for window work (common for egress windows in bedrooms or glass area changes), you may need a licensed installer to pull the permit.
Conclusion
Replacing individual window parts extends the life of your windows by decades and costs a fraction of full replacement. The keys are accurate identification, buying from the right supplier, and taking your time during installation. Most failures are wear items, balances, weatherstripping, operators, that any patient DIYer can handle with basic tools. For further guidance on advanced construction techniques and building envelope details, consult professional resources or local contractors when projects exceed your comfort level.