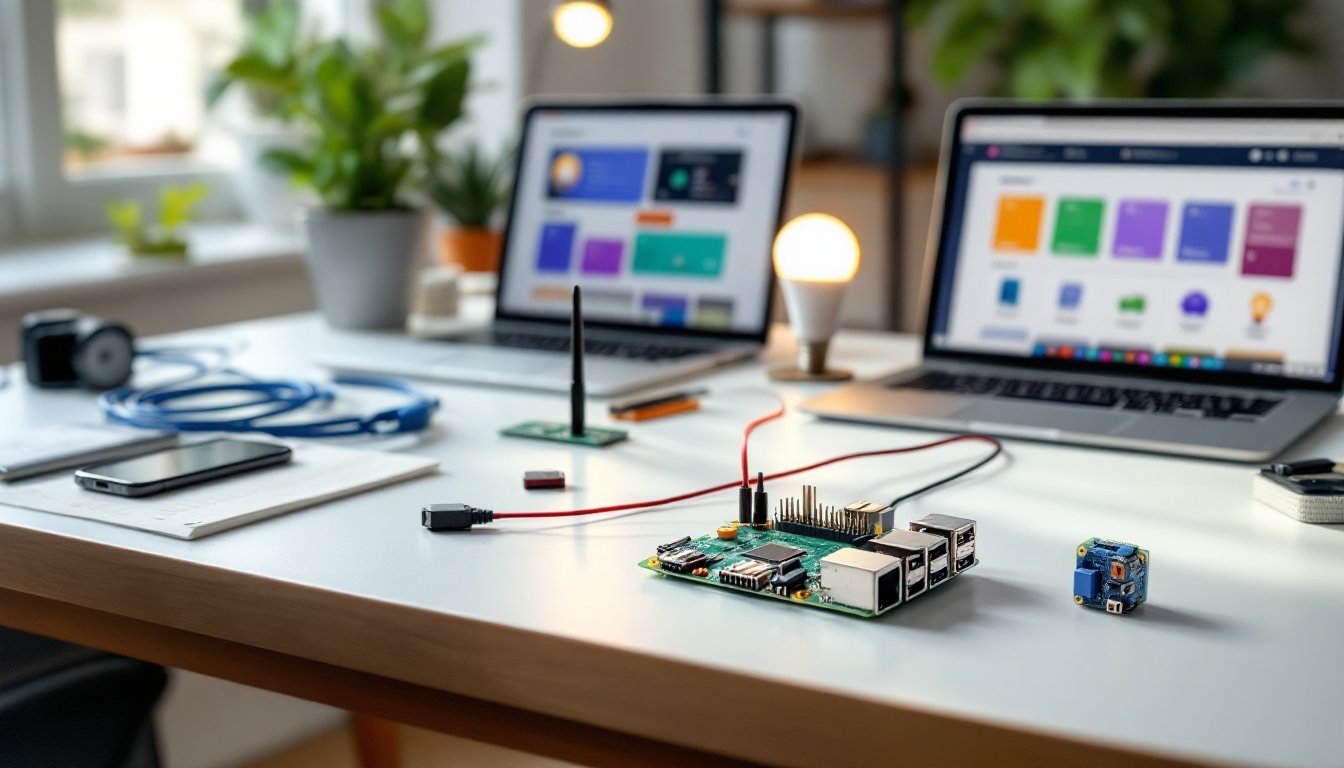
Building a smart home doesn’t require a massive budget or professional installation. A Raspberry Pi, that credit card-sized computer, can serve as the brain of a highly customizable home automation system. For around $35, DIYers can control lighting, climate, security cameras, and more using open-source software and a few basic electronics skills. Unlike closed commercial systems, Raspberry Pi automation gives users complete control over their data, unlimited expandability, and the satisfaction of building something from scratch. This guide walks through everything needed to turn a Raspberry Pi into a powerful home automation hub.
Table of Contents
ToggleKey Takeaways
- A Raspberry Pi home automation system costs just $35–65 and offers unlimited customization without monthly subscriptions or proprietary ecosystem lock-in, unlike commercial smart home hubs starting at $150–300.
- Home Assistant is the dominant open-source platform for Raspberry Pi automation, supporting 2,000+ device integrations and enabling motion-activated lighting, circadian rhythms, and presence-based automations through simple configuration.
- Essential hardware includes a Raspberry Pi 4 Model B (4GB RAM), 32GB+ microSD card, reliable power supply, and optional Zigbee/Z-Wave USB dongles to expand device compatibility across different smart home protocols.
- Climate control and smart lighting projects demonstrate immediate quality-of-life improvements, such as occupancy-based heating/cooling that adapts to real-time conditions and RGB LED strips controlled via GPIO pins.
- Common issues like device pairing failures, automation delays, and GPIO relay misfires can be resolved by checking USB dongle placement, purging the Home Assistant database, and verifying relay polarity in the device datasheet.
- Static IP assignment, automated backups, and proper electrical safety practices (including circuit breaker shutdown and insulated gloves) are critical to maintaining a stable and secure Raspberry Pi home automation setup.
Why Raspberry Pi Is the Perfect Platform for DIY Home Automation
The Raspberry Pi’s combination of affordability, flexibility, and community support makes it ideal for home automation.
First, cost. A Raspberry Pi 4 Model B (4GB RAM) runs about $55-65, while the Pi Zero 2 W costs just $15. Compare that to proprietary smart home hubs that start at $150-300 and lock users into specific ecosystems. With a Pi, there’s no monthly subscription, no cloud dependency, and no vendor deciding to discontinue support.
Compatibility is another major advantage. The Pi runs Home Assistant, OpenHAB, Domoticz, and other open-source platforms that integrate with nearly every smart device on the market, Zigbee, Z-Wave, Wi-Fi, Bluetooth, even infrared. If a device has an API or can be reverse-engineered, the Pi can control it. This means mixing brands without compatibility headaches.
The GPIO pins (General Purpose Input/Output) let users connect sensors, relays, LEDs, and other hardware directly to the board. Want to monitor soil moisture in houseplants and trigger a watering pump? Wire up a moisture sensor to GPIO pin 17, write a Python script, and it’s done. Commercial systems rarely offer that level of customization.
Processing power has improved dramatically. The Pi 4 handles complex automation rules, voice recognition via Mycroft or Rhasspy, and even light video processing from security cameras. The Pi’s quad-core ARM processor and up to 8GB RAM can run dozens of simultaneous automations without lag.
Finally, the community. Raspberry Pi forums, subreddits, and GitHub repositories contain thousands of pre-built projects, troubleshooting guides, and code libraries. Stuck on a setup step? Someone’s already solved it and posted the solution.
Essential Hardware and Software You’ll Need to Get Started
Start with the right components to avoid frustration mid-project.
Hardware Checklist
- Raspberry Pi 4 Model B (4GB RAM): The sweet spot for home automation. The 2GB version works but may struggle with video processing. The 8GB model is overkraft unless running multiple virtual machines.
- MicroSD card (32GB minimum, Class 10 or UHS-1): The Pi boots from this. SanDisk Extreme or Samsung EVO cards offer reliable read/write speeds. Go for 64GB if planning to store camera footage locally.
- Power supply (5V, 3A USB-C): Use the official Raspberry Pi power supply. Cheap phone chargers cause undervoltage warnings and random crashes.
- Case with cooling: Passive aluminum cases (like Flirc) work well, or choose one with a 30mm fan. The Pi 4 runs hot under load: overheating throttles performance.
- Ethernet cable or USB Wi-Fi adapter: Wired connections are more stable for time-critical automations. If using Wi-Fi, the Pi 4’s built-in dual-band adapter is solid.
- Zigbee or Z-Wave USB dongle: The ConBee II (Zigbee) or Aeotec Z-Stick (Z-Wave) expands device compatibility. Most smart bulbs, switches, and sensors use one of these protocols.
- Optional: Relay modules: 4-channel or 8-channel relay boards ($10-15) let the Pi switch high-voltage devices like lamps or fans. Make sure they’re optically isolated for safety.
Software Options
Home Assistant dominates the DIY automation space. It supports 2,000+ integrations, has a web-based UI, and runs well on Raspberry Pi via Home Assistant Operating System (formerly Hassio). Installation is straightforward: flash the image to a microSD card using Raspberry Pi Imager, boot, and access the interface at homeassistant.local:8123.
OpenHAB is Java-based and emphasizes local control. It’s more complex to configure but extremely powerful for custom rules.
Node-RED pairs well with Home Assistant for visual workflow automation, drag-and-drop logic beats writing YAML by hand.
For users who want to code everything from scratch, Raspbian OS (now called Raspberry Pi OS) plus Python libraries like RPi.GPIO and paho-mqtt provide full control.
Setting Up Your Raspberry Pi for Home Automation Projects
Proper setup prevents headaches later.
Step 1: Flash the OS
Download Raspberry Pi Imager (free, available for Windows/Mac/Linux). Select Home Assistant OS from the “Choose OS” menu under “Other specific-purpose OS.” Pick your microSD card, click Write, and wait 5-10 minutes. The imager verifies the write automatically.
Step 2: Initial Boot and Network Configuration
Insert the microSD card into the Pi, connect Ethernet (or configure Wi-Fi via a CONFIG/network/my-network file before first boot), and plug in power. The Pi takes 2-5 minutes to boot the first time. Navigate to http://homeassistant.local:8123 in a browser. If that doesn’t work, check your router’s DHCP list for the Pi’s IP address.
Create an account and set your location. Home Assistant uses this for sunrise/sunset automations and weather integrations.
Step 3: Add Integrations
Go to Settings > Devices & Services > Add Integration. Search for your devices, Philips Hue, TP-Link Kasa, Ecobee, etc. Many auto-discover on the local network. For integrating sensors, plug in your Zigbee or Z-Wave dongle and install the ZHA (Zigbee Home Automation) or Z-Wave JS integration.
Step 4: Configure GPIO (If Using)
For direct hardware control, enable SSH via Settings > System > Advanced > SSH. Connect via terminal and install the RPi.GPIO library:
sudo apt-get update

sudo apt-get install python3-rpi.gpio
Label GPIO pins physically with a printout or stickers. Accidental short circuits can fry the board, double-check wiring before powering on.
Step 5: Set Static IP and Backups
Assign a static IP in your router’s DHCP settings so the Pi’s address doesn’t change. Set up automated snapshots in Home Assistant (Settings > System > Backups > Schedule). Save backups to a USB drive or network storage. MicroSD cards fail eventually, and there’s nothing worse than losing 50 automation rules.
Safety note: If controlling high-voltage devices with relays, turn off the circuit breaker before wiring. Use heat-shrink tubing on all connections. If you’re not comfortable working with 120V or 240V, hire an electrician for the wiring and control the relay with the Pi.
Top Home Automation Projects You Can Build with Raspberry Pi
These projects demonstrate the Pi’s versatility and give immediate quality-of-life upgrades.
Smart Lighting Control Systems
Smart lighting is the easiest entry point. If you already have Philips Hue, TP-Link, or LIFX bulbs, Home Assistant discovers them automatically. The real power comes from automation rules:
- Motion-activated lighting: Pair a Zigbee motion sensor with a smart bulb. When motion is detected after sunset, turn on the hallway light at 30% brightness for 2 minutes.
- Circadian lighting: Adjust color temperature throughout the day, warm white (2700K) in the evening, cool white (5000K) during work hours. This mimics natural light and improves sleep cycles. The Adaptive Lighting integration in Home Assistant handles this automatically.
- Presence simulation: When away, randomize light patterns to mimic occupancy. Thieves case houses: a light turning on at exactly 6 PM every day screams “automation.”
For broader smart home projects, consider integrating RGB LED strips with the Pi’s GPIO. A WS2812B strip (individually addressable LEDs) connects to GPIO pin 18 and ground. The rpi_ws281x Python library controls color and effects. Mount strips under cabinets, behind monitors, or along stair risers for accent lighting that responds to music, time of day, or room occupancy.
Cost: $15-40 for Zigbee bulbs, $8-20 for motion sensors, $12-25 for a 5-meter LED strip.
Climate and Thermostat Automation
Controlling HVAC saves energy and improves comfort.
Most smart thermostat setups integrate Nest, Ecobee, or Honeywell T-series thermostats via API. Home Assistant’s climate entity lets you set schedules that adapt to real-time conditions:
- Occupancy-based heating/cooling: Use door sensors and presence detection (phone Wi-Fi connection, Bluetooth, or PIR sensors) to drop the setpoint when everyone leaves. Resume normal temperature 30 minutes before the first person typically arrives home.
- Multi-zone temperature balancing: In homes with uneven heating, use smart vents (Keen, Flair) or individual room sensors (Aqara, Sonoff) to adjust airflow. If the bedroom is 3°F warmer than the living room, close the bedroom vent partially.
- Weather-reactive adjustments: Pull data from OpenWeatherMap or a local weather station. If tomorrow’s high is forecast above 80°F, pre-cool the house at night when electricity is cheaper (if on time-of-use billing).
For a DIY approach, wire a DHT22 temperature/humidity sensor ($5-10) to the Pi’s GPIO pins and use a relay to control a space heater or window AC unit. This works well for workshops, garages, or basements not connected to central HVAC.
Warning: Modifying central HVAC wiring may violate warranty or local codes. Consult an HVAC technician if unsure. Controlling portable devices with relays is generally safe for DIYers with basic electrical knowledge.
Cost: $0-5 for API integration with existing thermostats, $5-25 for sensors, $40-80 for smart vents.
Troubleshooting Common Raspberry Pi Home Automation Challenges
Every setup hits snags. Here’s how to fix the most frequent issues.
Problem: Pi won’t boot or shows a rainbow screen
Cause: Corrupted microSD card or insufficient power.
Fix: Re-flash the card using Raspberry Pi Imager. If that doesn’t work, test with a different card. Check the power supply, anything under 5V/2.5A causes instability. Use a USB multimeter ($10-15) to verify voltage under load.
Problem: Devices won’t pair or show as “unavailable”
Cause: Zigbee/Z-Wave network congestion, interference, or wrong protocol.
Fix: Verify the device uses Zigbee or Z-Wave (not just “smart” or “Wi-Fi compatible”). Check that the USB dongle is on a different channel than Wi-Fi (Zigbee channels 15, 20, or 25 avoid 2.4GHz Wi-Fi overlap). Add a USB extension cable to move the dongle away from the Pi, USB 3.0 ports generate RF noise that jams Zigbee. Pair devices within 3 feet of the dongle initially, then move them to final locations.
Problem: Automations fire late or not at all
Cause: Database growth or resource limits.
Fix: Home Assistant’s database balloons over time. Purge old data via Settings > System > Storage > Purge. Set the recorder to keep only 7-14 days of history unless long-term analytics are needed. If using a Pi 3 or older, upgrade to a Pi 4 or move the database to an SSD via USB 3.0 SATA adapter (huge performance boost).
Problem: GPIO relay triggers unexpectedly or won’t switch
Cause: Floating pins, incorrect wiring, or relay logic inversion.
Fix: Many relays are active-low, meaning GPIO LOW (0V) turns them ON, not HIGH (3.3V). Check the relay datasheet. Add pull-down resistors (10kΩ) to prevent floating pins from triggering relays during Pi boot. Use GPIO.setmode(GPIO.BCM) in Python scripts to match the BCM pin numbering most tutorials use.
Problem: Remote access doesn’t work
Cause: Router firewall, CGNAT, or no dynamic DNS.
Fix: Use Nabu Casa Cloud ($6.50/month) for encrypted remote access without port forwarding. For a free option, set up WireGuard VPN on the Pi or use DuckDNS with port forwarding (forward port 8123, but change the default port and enable SSL to avoid bots).
PPE reminder: When working inside electrical panels or wiring relays to mains voltage, shut off the breaker, wear insulated gloves, and use a non-contact voltage tester to confirm power is off.
For troubleshooting specific automation examples, Home Assistant’s built-in trace tool shows exactly where an automation succeeded or failed. Many automation costs come from trial-and-error with incompatible hardware: researching device compatibility before buying saves money. Advanced users seeking professional credentials in smart home technology can build impressive portfolios with Raspberry Pi projects. Finally, while various platforms offer pre-built solutions, Raspberry Pi’s open architecture provides unmatched learning opportunities and customization.